Docker Container Connection Refused

I’ve been playing with .NET Core CLI recently and came across cli-samples on Github. The projects in this repository show working examples using the dotnet CLI and ASP.NET 5. Everything runs well on Mac OS. Then I decided to make a docker image from the HelloMvc project.

The Dockerfile is quite simple

FROM microsoft/dotnet-preview
RUN mkdir /src
WORKDIR /src
ADD . /src
RUN dotnet restore
RUN dotnet build
CMD dotnet run

Built and runned with port 5000 exposed

docker run --rm  -v $(pwd):/src -p 5000:5000 -w /src HelloMvc

The application started and was listening on port 5000. Looks good.

Project HelloMvc (.NETCoreApp,Version=v1.0) will be compiled because inputs were modified
Compiling HelloMvc for .NETCoreApp,Version=v1.0
/src/HelloMvc/project.json(6,26): warning DOTNET1015: The 'compilationOptions' option is deprecated. Use 'buildOptions' instead.

Compilation succeeded.
    1 Warning(s)
    0 Error(s)

Time elapsed 00:00:07.9852201

dbug: Microsoft.AspNetCore.Hosting.Internal.WebHost[3]
      Hosting starting
dbug: Microsoft.AspNetCore.Hosting.Internal.WebHost[4]
      Hosting started
Hosting environment: Production
Content root path: /src/HelloMvc
Now listening on: http://localhost:5000
Application started. Press Ctrl+C to shut down.

The IP address of docker machine is

docker-machine ip default

192.168.99.100

However, when I opened a browser and typed in http://192.168.99.100:5000, I saw this

This site can’t be reached

192.168.99.100 refused to connect.

What is going on? It worked well without container, and port 5000 is exposed to outside access. When listing the active containers, I can see that the port binding is from 0.0.0.0:5000 to 5000, which allows inbound access from all network interfaces.

docker ps

CONTAINER ID        IMAGE                      COMMAND             CREATED             STATUS              PORTS                 
c94a021995d9        HelloMvc   "dotnet run"         12 seconds ago      Up 11 seconds       0.0.0.0:5000->5000/tcp  

However, the MVC application listens to 127.0.0.1:5000 by default, which is a loopback IP address. As a result, it only acceps connection requets within the current host. Connections from outside the container will be simply refused. I need to make it listen to all network interface by listening to 0.0.0.0. All that need to be changed was the program.cs

public class Program
{
    public static void Main(string[] args)
    {
        var host = new WebHostBuilder()
                    .UseKestrel()
                    .UseContentRoot(Directory.GetCurrentDirectory())
                    .UseIISIntegration()
                    .UseStartup<Startup>()
                    .UseUrls("http://0.0.0.0:5000")
                    .Build();

        host.Run();
    }
}

Hope this may save someone a few hours of time.
Run GitLab on QNAP NAS With Container

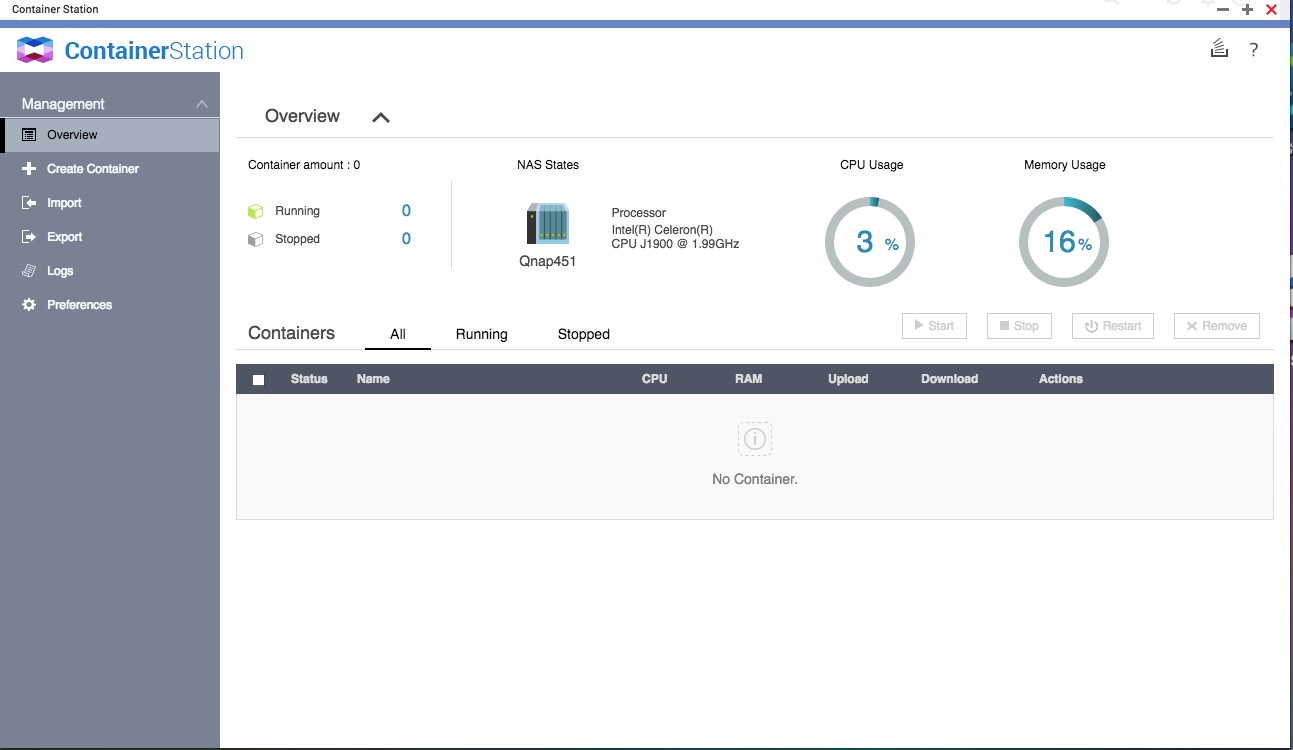
GitLab is a web-based Git repository manager with Git repository management, code reviews, issue tracking, wikis. It is very similar to GitHub but can be hosted on your own server. It will be awesome to have an on-premise git server for my private projects and personal documents. I can also use it to mirror remote repositories hosted on GitHub. Recently I bought a QNAP 451 NAS. It has a feature called Container Station, which integrates Linux Containers (LXC) and Docker virtualisation technologies. Container Station allows me to operate multiple isolated Linux® systems on a QNAP NAS. This makes this NAS a perfect host for my git server.

Create a GitLab container

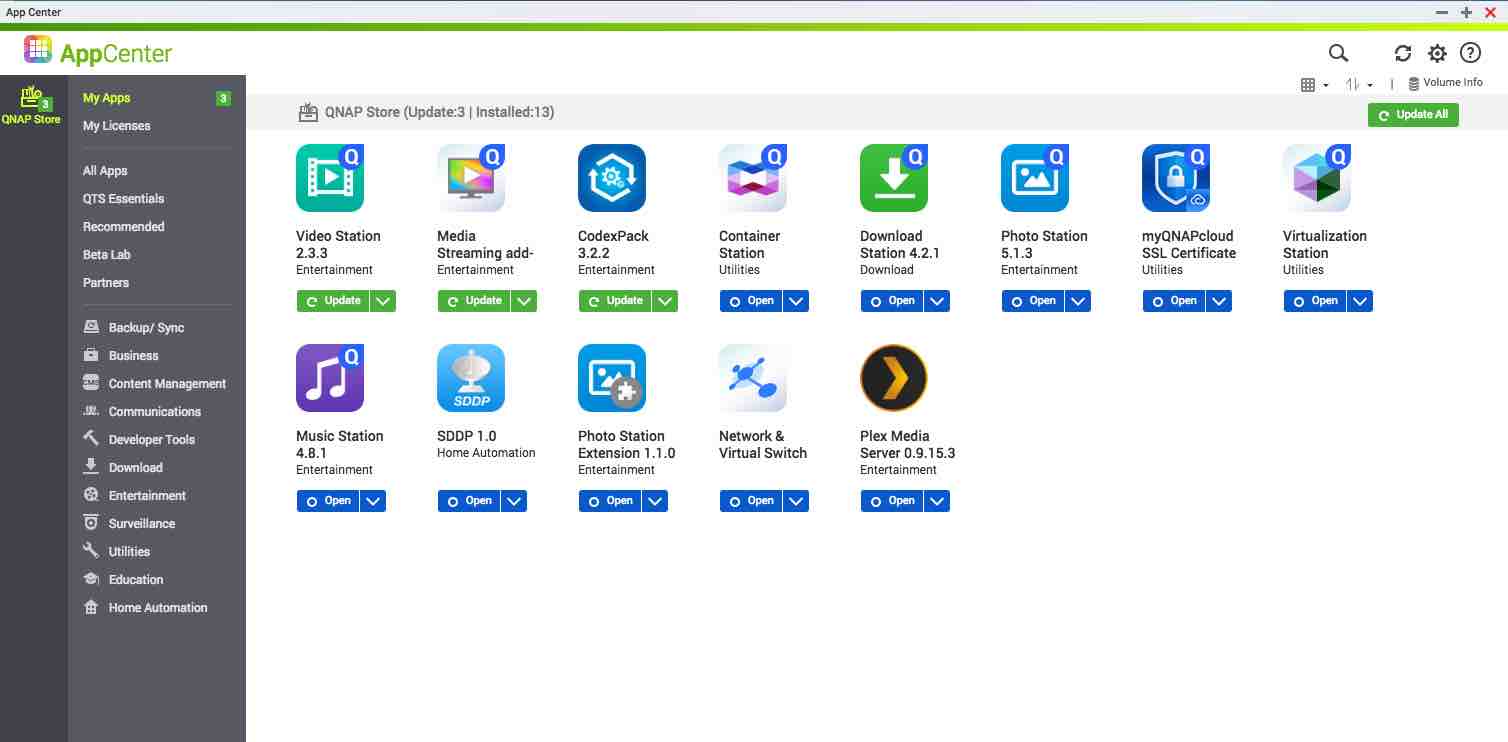
First you need to have Container Station Installed. Here you can find detailed instructions on how to do that.

App Store

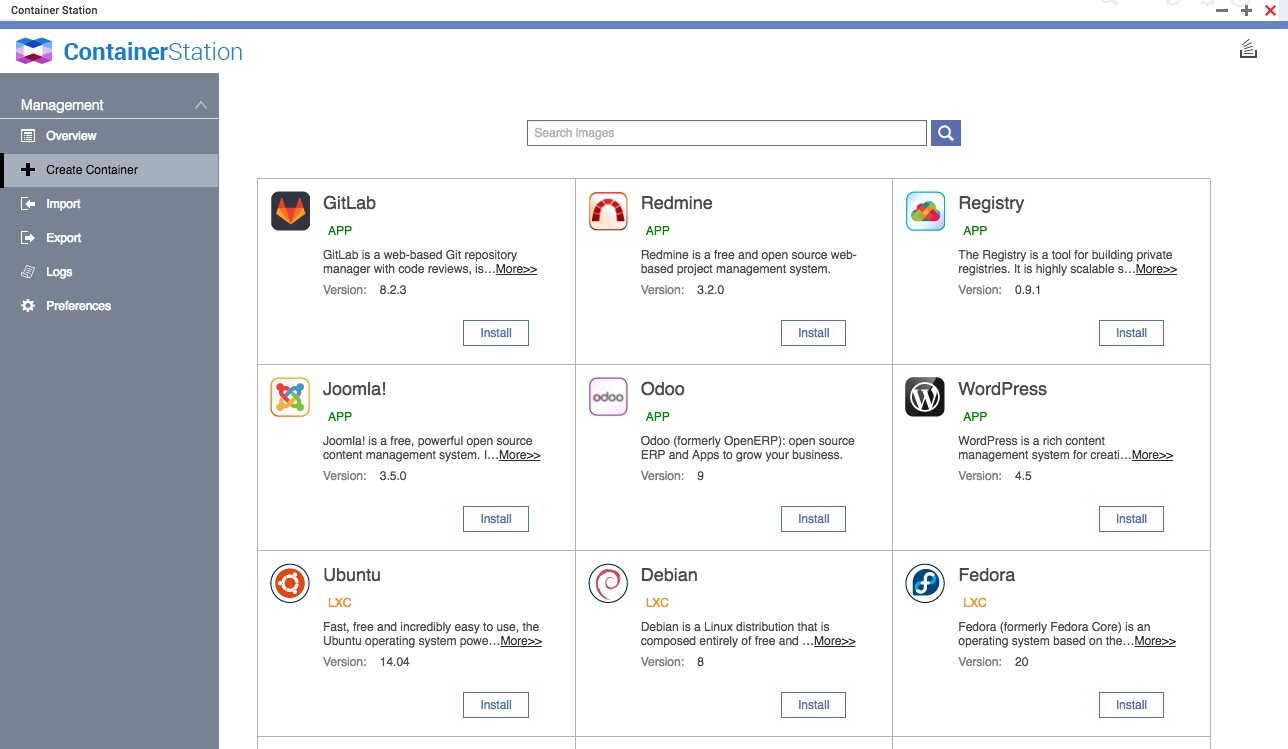
Then open Container Station, click Create Container, choose GitLib which happens to be the first one in the list.

App Store

App Store

Docker images are pulled from the popular docker registry Dockerhub. It is interesting to see that QNAP Container Station knows to launch the GitLib image with docker-compose. Which results in creating three containers. These three containers provide a complete GitLab service.

gitlab1_gitlab_1
gitlab1_postgresql_1
gitlab1_redis_1

Each container can be individually configured from UI.

App Store

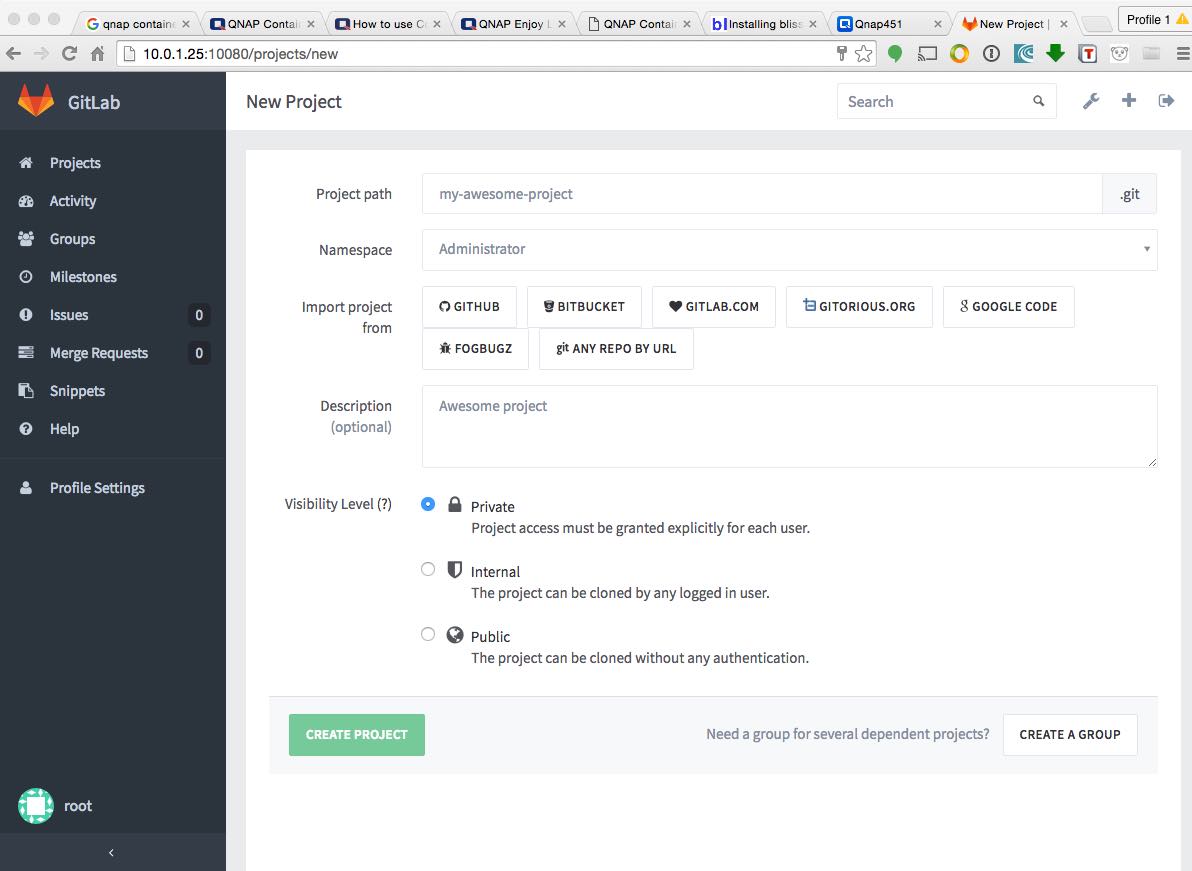
Open a web browser and go to http://10.0.1.25:10080/, log in(default username / password: root / 5iveL! Fe) to start using GitLab.

App Store

I want to checkout out what is running under the hood. Open a terminal and SSH into the NAS, list all the running containers.

ssh root@10.0.1.25

[~] # docker ps
CONTAINER ID        IMAGE                         COMMAND                  CREATED             STATUS              PORTS                                                   NAMES
e0805483da90        sameersbn/gitlab:8.2.3        "/sbin/entrypoint.sh "   21 hours ago        Up 21 hours         443/tcp, 0.0.0.0:10022->22/tcp, 0.0.0.0:10080->80/tcp   gitlab1_gitlab_1
13491bc0d510        sameersbn/postgresql:9.4-11   "/sbin/entrypoint.sh"    21 hours ago        Up 21 hours         5432/tcp                                                gitlab1_postgresql_1
25217f65f54a        sameersbn/redis:latest        "/sbin/entrypoint.sh"    21 hours ago        Up 21 hours         6379/tcp                                                gitlab1_redis_1

Note except gitlab1_gitlab_1, other two don’t have ports map to the host. How does the gitlab1_gitlab_1 connect to them?
Lets take a close look at inspect gitlab1_gitlab_1

docker inspect gitlab1_gitlab_1

...
    "Links": [
        "/gitlab1_postgresql_1:/gitlab1_gitlab_1/postgresql",
        "/gitlab1_postgresql_1:/gitlab1_gitlab_1/postgresql_1",
        "/gitlab1_redis_1:/gitlab1_gitlab_1/redis_1",
        "/gitlab1_redis_1:/gitlab1_gitlab_1/redisio",
        "/gitlab1_postgresql_1:/gitlab1_gitlab_1/gitlab1_postgresql_1",
        "/gitlab1_redis_1:/gitlab1_gitlab_1/gitlab1_redis_1"
    ],
...

Aha, here we go. Instead of network port mappings, it uses linking system to connect to postgressql and redis services. Very neat!

Network port mappings are not the only way Docker containers can connect to one another. Docker also has a linking system that allows you to link multiple containers together and send connection information from one to another. When containers are linked, information about a source container can be sent to a recipient container. This allows the recipient to see selected data describing aspects of the source container

Summary

Thanks for Container Station, setting up a GitLab server on QNAP NAS is a straight forward and joyful job. QNAP does an excellent job in integrating Docker virtualization with its QTS operating system. If you need more control, you still have full access to the Docker engine which QNAP Container Station built on top.

Get Started With .NET Core on Docker

New .NET Core is the biggest change since the invention of .NET platform. It is fully open-source, componentised and is supported by Windows, Linux and Mac OSX. In this post I am going to give it a test ride by creating a containerized C# appliction with the latest .NET CORE CLI tool. I want to get a feel of how this experience is close to working with node.js or ruby.

Enviroment

Instead of installing .NET Core and CLI tool locally, I am going to use a .NET container as both the build and runtime environment. Offical .NET Docker images are hosted at https://hub.docker.com/r/microsoft/dotnet. Instructions on how to install Docker can be found from here: Mac , Windows, Linux.

##Application

I am building a solution to solve Poker hands problem. First, Lets get started by adding a project directory.

mkdir poker_hands
cd poker_hands

Then create a new project with the CLI tool

docker run --rm -v "$PWD":/src -w /src microsoft/dotnet:0.0.1-alpha dotnet new

The dotnet new command adds 3 new files into the working directory

NuGet.Config
Program.cs
project.json

NuGet.Config contains sources that NuGet packages can be loaded from. Program.cs contains application entry point which is a static Main method. Project.json is the project configuration file. Lets take a close look at it. (Note I have made changes to the generated one)

{
    "version": "1.0.0-*",
    "compilationOptions": {
        "emitEntryPoint": true
    },

    "dependencies": {
       "NETStandard.Library": "1.0.0-rc2-23811"
       "xunit": "2.1.0"
       "dotnet-test-xunit": "1.0.0-dev-128011-22"
    },

    "frameworks": {
        "netstandardapp1.5": {
          "imports": "dnxcore50"
       }
    }
}

emitEntryPoint is set to true, which tells .NET runtime to invoke Main method as entry point when the application runs. For class libraries, this setting is not needed.
In dependencies section, there is NETStandard.Library. This is a reference NuGet Package that references other packages such as System.Console, System.Collections. Unlike .NET framewokr, .NET Core is pay-to-play. To use Console, Collections, Linq and other features in code, corresponding packages must be installed as dependencies. The frameworks section lists all the Frameworks this application supports. Since I am targeting .NET Core only, just netstandardapp1.5 is included. The imports section maps old dnxcore50 to this new moniker. It is also possible to add “net46” to frameworks section. That will enable the application to support .NET framework 4.6. However, doing so will make this application lose its ability to run on a Linux runtime.

To make this application a self-contained docker image, we need a Dockfile

FROM microsoft/dotnet:0.0.1-alpha
RUN mkdir /src
WORKDIR /src
ADD . /src
CMD sh run.sh

run.sh is a helper script that calls restore and build before run

dotnet restore 
dotnet build
dotnet run

Run the application

docker build -t problem54 .
docker run -rm -v $(pwd):/src --rm  problem54 

If everything goes well, you are going to see “Hello World” printed out in the terminal. Not a very exciting application so far.

Unit testing

My first attempt was to use NUnit. However, NUnit console (and the underlying NUnit Engine) do not support running unit tests against .NET core yet. There is a work around according to this answer to my question on Stack Overflow. I gave it a try and it did work. Then I switched to XUnit which comes with a runner supports .NET Core. To use XUnit, add xunit and dotnet-test-xunit into dependencies section:

"dependencies": {
   "xunit": "2.1.0"
   "dotnet-test-xunit": "1.0.0-dev-128011-22",
   "NETStandard.Library": "1.5.0-rc2-23931"
}

and add this line to the project.json

"testRunner": "xunit"

Now add a test file and first test.

Poker_hands_tests.cs

using Xunit;
using Poker.models;

namespace Poker.tests
{
    public class Hand_tests {
        [Fact]
        public void Hight_card()
        {
            var result = Game.Judge("8C TS KC 9H 4S 7D 2S 5D 3S AC");
            Assert.True(result == 0);
        }
    }
 }

And update the run.sh to

dotnet restore 
dotnet build
dotnet test

Run tests:

docker run -rm -v $(pwd):/src --rm  problem54 

Following the green-red-refactory process, add tests and implementation until all scenarios are covered. Then we get a solution. The final code can be found here.

Summary

In this post I have shown how we can develop and run an application based on .NET Core in a Docker container. Although be in the very early stages, the .NET Command Line Interface tool seems to be as easy to use as NPM or bundler.